The practical no frills guide.
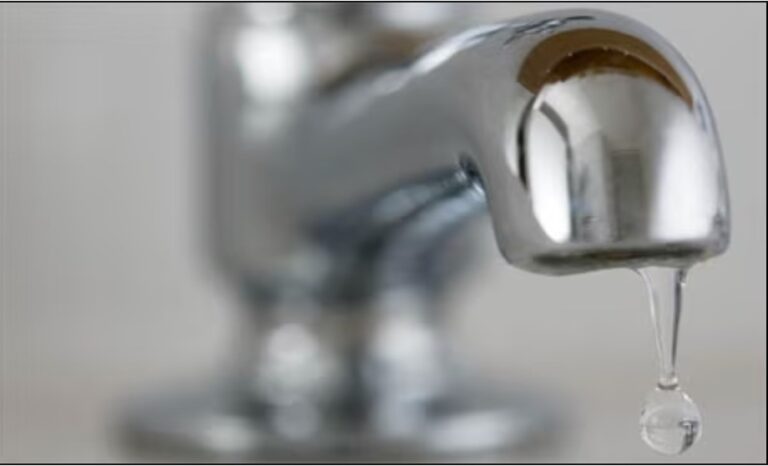
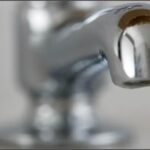
Taps are essential fixtures in our homes, providing us with a convenient and controlled supply of water. Over time and mostly due to just normal use, they can become stiff – difficult to turn on or off, start to drip, reduce their water flow or even leak.
Mastering tap repair – the no frills guide, gives homeowners the knowledge and skills needed to troubleshoot and repair common tap problems.
From understanding the different types of taps to how to do step-by-step repairs, you’ll be able to maintain a working and efficient source of water in your kitchen or bathroom.
Before undertaking any/all plumbing, heating or related work you should always take your own independent professional advice.

Plumber - Paul
Paul's a member of the Chartered Institute of Plumbing & Heating Engineers, Water Regs UK (formerley WRAS – Water Regulations Advsiory Scheme) certificated as well as a qualified unvented cylinder engineer and a qualified heat pump engineer.
Know your tap type
Before diving into tap repair, it’s crucial to understand the different types of tap commonly found in homes.
Compression taps
Recognised by separate hot and cold handles.
Operate by compressing a rubber washer against a valve seat to control water flow.
Ball taps
Identified by a single handle that controls both temperature and water flow.
Use a ball bearing and rubber seals to control water flow.
Cartridge taps
Feature a single handle that moves in a cartridge to regulate water flow.
Cartridges come in various forms, including single and double-handle versions.
Ceramic disk taps
Use ceramic disks to control water flow.
Recognised by a single handle and a sleek design.
5 of the most common tap problems
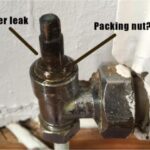
1. Leaking tap
Possible causes
- Worn-out washers (compression tap).
- Damaged O-rings or seals.
- Corroded valve seat.
DIY repair
- Replace worn-out washers or O-rings.
- Smooth or replace the valve seal.
- For cartridge or disk taps, replace the entire cartridge or disk assembly.
2. Dripping tap
Possible causes
- Worn-out, damaged or misaligned components.
- Loose connections or parts.
- Issues with internal mechanisms (cartridge or ceramic disc taps).
DIY repair
- Inspect and replace worn, damaged or misaligned components.
- Replace faulty cartridges or ceramic discs.
- Tighten loose connections.
3. Reduced water flow
Possible causes
- Aerator clogs.
- Sediment or debris in the tap.
DIY repair
- Remove and clean the aerator.
- Disassemble the tap and clean internal components.
4. Handle difficult to turn
Possible causes
- Mineral deposits affecting the handle’s movement.
- Worn-out or damaged components.
DIY repair
- Clean the handle and components to remove mineral deposits.
- Replace worn-out or damaged components.
5. Water temperature issues
Possible causes
- Issues with the thermostat (cartridge or ceramic disc taps).
- Malfunctioning mixing valve.
DIY Repair
- Adjust the thermostat in cartridge or ceramic disc taps.
- Check and replace a malfunctioning mixing valve.
9 tools you'll need to repair taps
To effectively troubleshoot and repair a tap, having the right tools is essential. Here’s a list of tools typically used in tap repairs:
- Adjustable spanner/wrench. For loosening and tightening nuts and bolts.
- Plumber’s tape – ptfe (polytetrafluoroethylene). This is a hydrophobic (water repellent) tape used to seal threads and prevent leaks.
- Screwdriver set. Phillips and flathead screwdrivers for various components.
- Allen key set. For removing set screws.
- Needle-nose pliers. For handling small components.
- Plunger. For clearing clogs in the drain or spout.
- Pipe cutter (for copper pipes). For cutting and replacing pipes if necessary.
- Bucket. To catch water and debris during disassembly.
- Plumbing lubricant. To facilitate the smooth movement of components during reassembly.
Tap repair - step by step
Turn-off water supply.
Locate the shut-off valves under the sink and turn off the water supply.
Close the drain.
Place a cloth or stopper in the drain to prevent small parts from falling down.
Determine tap type.
Identify the type of tap (compression, ball, cartridge, or ceramic disk).
Disassemble the tap.
Remove the handle(s) using a screwdriver or hex wrench.
Depending on the type, remove the bonnet nut, retaining ring, or cartridge assembly.
Inspect and replace components.
Examine washers, O-rings, or other components for wear or damage.
Replace worn or damaged parts with new ones.
Clean aerator and components.
Remove the aerator at the tip of the spout.
Clean the aerator and other components to remove debris or sediment.
Check for leaks.
Turn on the water supply and check for leaks at various connections.
Tighten any loose connections.
Reassemble the tap.
Apply plumber’s tape to threaded connections.
Reassemble the tap in reverse order, ensuring a snug fit for all components.
Turn on water supply.
Gradually turn on the water supply to avoid sudden pressure changes.
Test the tap.
Turn on the tap and check for leaks, proper water flow, and correct temperature control.
Adjust single-lever tap temperature (if applicable).
If the tap has a thermostat for temperature control, adjust it to the desired setting.
5 preventative maintenance tips
1. Regular cleaning.
Clean the tap regularly to prevent mineral deposits and debris buildup.
2. Check and replace washers or O-rings.
Periodically inspect washers or O-rings for wear and replace them as needed.
3. Address leaks promptly.
Fix any leaks as soon as they are detected to prevent further damage.
4. Use plumbing lubricant.
Apply plumbing lubricant to moving parts during reassembly for smooth operation.
5. Install a water conditioner or water softener.
Consider installing a water conditioner or wate softener to reduce mineral deposits in the tap.
Replacing taps and new taps
The time will come when you want or need to replace one or more of your kitchen and or bathroom taps.
When this happens always choose taps and fittings that are WRAS (Water Regulations Advisory Scheme) approved – the approval scheme of the UK Water Industry. This ensure that taps and fittings are of the highest quality and meet the requirements of the Water Supply (Water Fittings) Regulations 1999 and amendments.
You’ll find the WRAS logo on the packaging and in the product description. If it’s not there, you risk fitting a cheaply made tap and these will need more maintenance, and replacing far sooner.
Signing-off
Taps are integral to our daily lives, and a malfunctioning tap can be a significant inconvenience. By understanding the type of tap you have and following the step-by-step guide, homeowners will be able to troubleshoot and repair common tap issues.
Remember, regular cleaning, preventive maintenance, and dealing with leaks quickly contribute to the efficiency and life of these essential fixtures. With the right tools, a can-do mindset, and of course practice, you can master the art of tap repair and ensure a reliable and efficient water source in your home’s kitchen, utility room and bathroom.
And if you’d like some help fixing your taps from our local Caversham plumbers near me, we’d be pleased to. We’re only a phone call, text, WhatsAp or email away!
AngusPLUMBING
(Caversham’s #1 plumbers)
Disclaimer
Our mastering series and blog are provided on an “as is” basis, in good faith and subject to change without notice. All reasonable efforts have been made to ensure its accuracy. However, this isn’t warrantied, and liability isn’t accepted for any damage or loss whether direct, indirect, special or consequential suffered by anyone in accessing, downloading, using or relying on it.
More from our Mastering - no frills series....