The practical no frills guide.
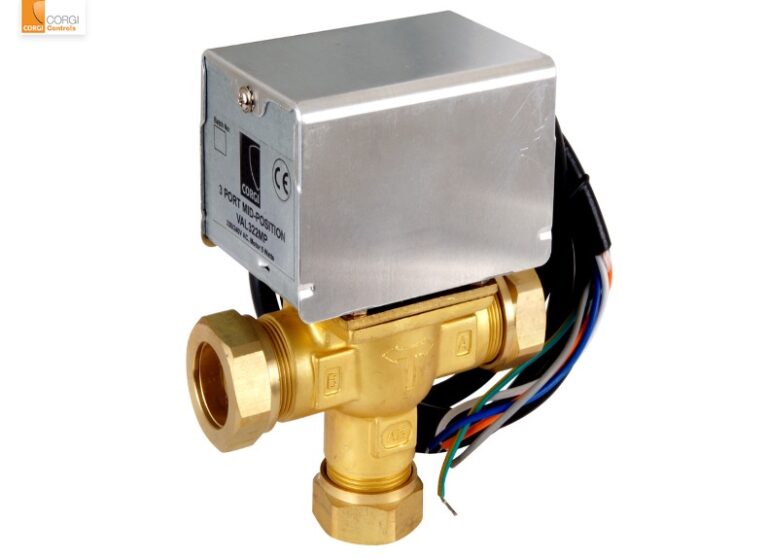
In a domestric boiler system, a 3-port valve (diverter valve) is a mid-position three way valve enabling independent control of a home’s heating and hot water.
The valve’s default position – fully open port B and closed port A (with no electric supply to any of the control wires) supplies heat to the hot water circuit only.
When the 3-port valve is instructed to close port B and open port A, hot water will be supplied to the heating circuit only.
And when it’s in mid-position hot water will be supplied to both the hot water circuit and the heating circuit.
3-port valves have sensitive gears and precision parts that are prone to hardening, sticking and seizing. Depending on the level of clogging or hardening replacing the unit may be a better option than repair.
Mastering 3-port valve repair – the no frills guide, gives homeowners the knowledge and skills needed to identify, troubleshoot and repair common 3-port valve problems and replace the valve if needed.
Before undertaking any/all plumbing, heating or related work you should always take your own independent professional advice.

Plumber - Paul
Paul's a member of the Chartered Institute of Plumbing & Heating Engineers, Water Regs UK (formerley WRAS – Water Regulations Advsiory Scheme) certificated as well as a qualified unvented cylinder engineer and a qualified heat pump engineer.
Signs that a boiler 3-port valve may need repair or replacing
No hot water or heating
If you’re not getting hot water or the heating is not working, it could be a sign that the three-port valve is not directing water properly.
Partial heating or hot water
Uneven heating or only partial hot water supply may indicate a partial failure in the three-port valve.
Constant heating
If the heating is on continuously, even when it’s not supposed to be, it may be a result of a faulty three-port valve that is not closing off the central heating circuit.
Noisy operation
Unusual noises, such as clicking or banging sounds, during the operation of the boiler could indicate problems with the three-port valve.
Leaks
Visible leaks around the three-port valve or signs of water damage could suggest a faulty valve that needs attention.
Faulty diverter motor
The 3-port valve is typically controlled by a motor. If the motor fails or starts making unusual noises, it may require repair or replacement.
Stuck valve
If the valve gets stuck in one position, it can lead to issues with either the heating or hot water supply.
Error codes on boiler display
Modern boilers often have digital displays that show error codes. If your boiler is displaying an error related to the three-port valve, it’s a clear indication that there’s an issue.
System pressure problems
A malfunctioning three-port valve can sometimes result in a drop in system pressure. Check the boiler pressure gauge for abnormalities.
System age
If your boiler is relatively old, and you’re experiencing issues with heating or hot water, the three-port valve may be at the end of its lifespan.
If you see any of these signs, they need to be taken care of quickly to prevent further damage to the boiler system.
Bear in mind that, correctly diagnosing and repairing the three-port valve can be complex and may require the expertise of a qualified heating engineer or technician.
Attempting DIY repairs on the valve or the associated electrical components without proper knowledge may lead to further problems and safety risks.
How do you repair your boiler 3-port valve?
Repairing a boiler three-port valve can be a technical, complex process and involves working with electrical components so safety is a top priority. If you’re not comfortable with these or don’t have the necessary skills it’s usually best to consult with an expert.
Tools and materials you'll need for repair
To effectively troubleshoot and repair a 3-port valve, having the right tools is essential. Here’s a list of what’s typically needed:
- Screwdrivers
- Adjustable spanner or wrench
- Replacement 3-port valve or parts
- Pipe cutter (if necessary)
- Pipe joint compound or ptfe tape
- Multimeter (for testing electrical components)
- Towels or rags (to catch any water leaks)
3-port valve repair / replacement - step by step
Turn off power
Switch off the power supply to the boiler at the circuit breaker.
Turn off water supply
Shut off the water supply to the boiler.
Drain the system (if necessary)
If the 3-port valve is in a position where draining is required, use a hose to drain the system to a suitable drain point.
Identify the valve
Locate the 3-port valve in the boiler system. It’s typically near the boiler and controls the flow of water between the central heating and hot water systems.
Disconnect electrical connections
Disconnect the electrical connections to the valve.
Use a multimeter to ensure there is no power.
Remove the valve
Use a wrench to disconnect the pipework from the valve.
Remove the fixing screws or nuts securing the valve to the mounting bracket.
Inspect the valve
Examine the valve for any visible damage or signs of wear.
Check the motor, actuator, and internal components.
Replace or repair
If the valve is severely damaged, it’s often more practical to replace it with a new one.
If the issue is a minor fault in the motor or actuator, you might be able to replace those components individually.
Install the new valve
Position the new valve in place and secure it with the fixing screws or nuts.
Reconnect the pipework, ensuring it is properly sealed with pipe joint compound or ptfe tape.
Reconnect electrical components
Reconnect the electrical wires to the new valve. Ensure proper connections and use a multimeter to check for continuity.
Repressurise and test
If you had to drain the system, repressurise it to the recommended level.
Turn on the power supply and test the boiler to ensure the three-port valve is functioning correctly.
Check for leaks
Inspect all connections for leaks and address any issues.
Signing-off
By following the step-by-step guide, homeowners will be able to troubleshoot and repair common 3-port valve issues and problems or replace the valve if needed.
With the right tools, a can-do mindset, and of course practice, you can master the art of repairing a central heating 3-port valve.
Always refer to the manufacturer’s guidelines and follow proper safety procedures. If you’re unsure about any step or if the issue is complex, it’s advisable to seek professional assistance to ensure the repair is done safely and effectively.
And if you’d like some help fixing or replacing your heating systems 3-port valve from our local Caversham plumbers near me, we’d be pleased to. We’re only a phone call, text, WhatsAp or email away!
AngusPLUMBING
(Caversham’s #1 plumbers)
Disclaimer
Our mastering series and blog are provided on an “as is” basis, in good faith and subject to change without notice. All reasonable efforts have been made to ensure its accuracy. However, this isn’t warrantied, and liability isn’t accepted for any damage or loss whether direct, indirect, special or consequential suffered by anyone in accessing, downloading, using or relying on it.
More from our Mastering - no frills series....